Improving Your Web Page Loading Speeds 📈
In this article I’ll be explaining some tips and tricks you can implement in order to help vastly improve the page loading times of your website. However we’ll kick things off by looking at a small list of free tools you can use in order to check whether your website is up to speed or not…
Page Speed Audit Tools
There are an abundance of website audit tools available for free which can help you monitor your websites page loading times. Some of the suggestions below might not be the best solution for your site as different audit tools will report on different aspects of a site (e.g image file sizes, server configuration, font types, etc). Therefore it’s important to take any results your receive with a “pinch of salt” as one audit tool might score your site highly whilst another might score it poorly. Also it’s important to note some tools will only audit one page whilst another will do an entire site wide audit.
Depending on what your site does, it will most likely have an effect on what score you get. For example if you have a site that is content rich with lots of images, videos and third party scripts all being loaded onto the same page then this will have a negative effect on your overall page speed performance. However a basic blog site with a small number of assets and mainly text heavy will score more highly (that’s why this site scores so well 😉). So my rule of thumb is: the simpler the site, the quicker the loading times will be.
Here’s some of my favourites for testing page speeds:
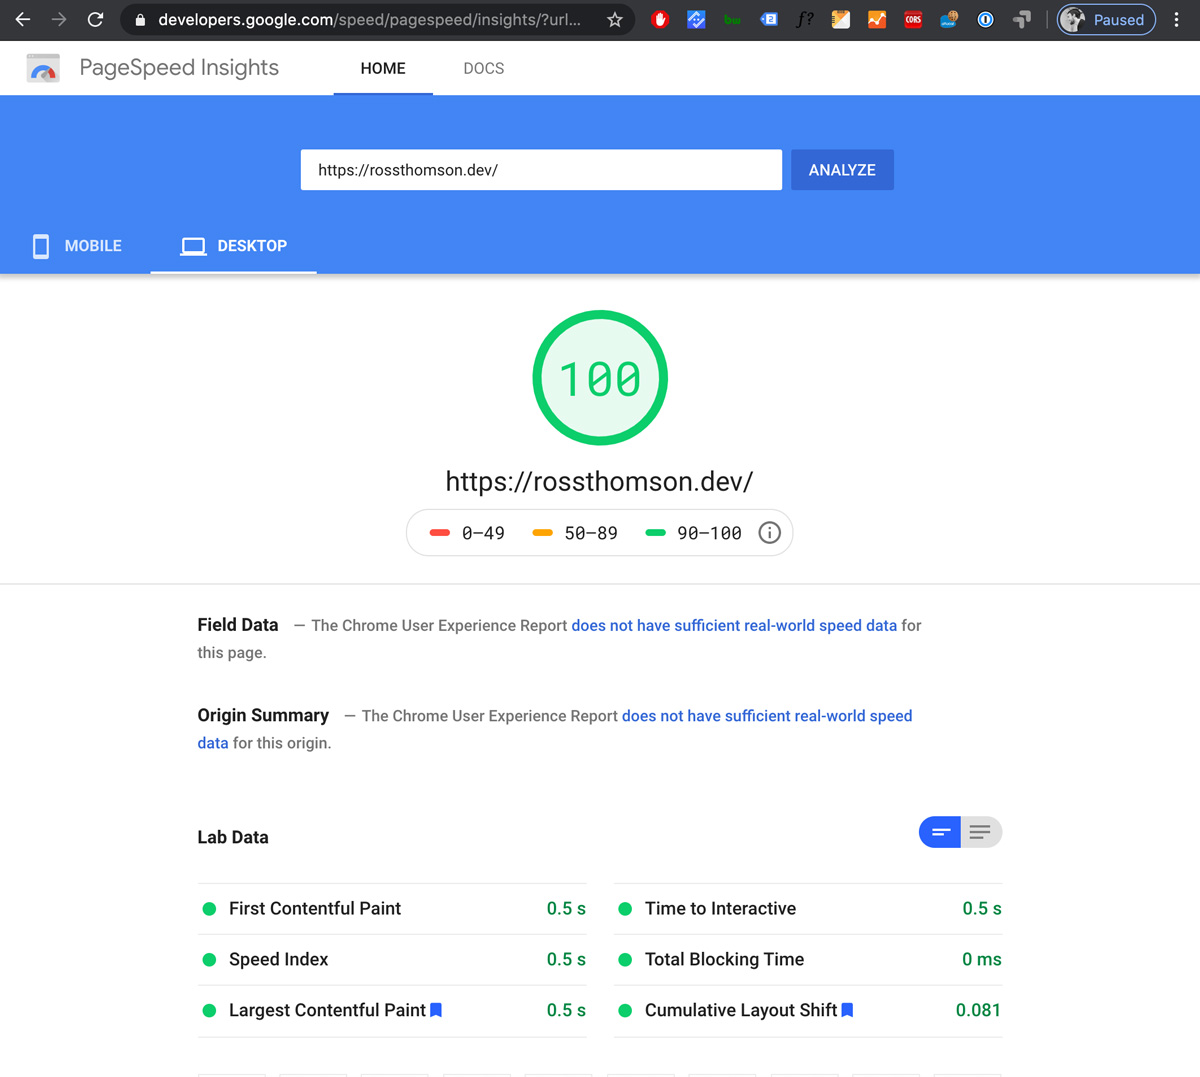
PageSpeed Insights by Google
Link: https://developers.google.com/speed/pagespeed/insights/
Google PageSpeed insights is one of the most popular page speed audit tools you can use and almost every web developer out there will have come across this at some point. If you haven’t, then be aware that this tool will audit just ONE page of your site. So for instance, if you add your homepage link to the URL input (in the link above) then you’ll only receive a score for that specific page - this is ideal for checking individual pages of a site which are taking a long time to load. In regards to results it will provide them based on your web pages assets, caching, file size compression, third party scripts and flag anything it deems to be a hindrance. It also describes what actions you should take in order to solve any of the flagged issues to improve your performance score:
Note: Page speeds are taken into account for SEO so improving them can also improve your Google search Rankings!
Lighthouse (DevTools Chrome)
Another great tool provided by Google lives right inside your Chrome Browser DevTools (if that’s your browser of choice of course). The “Lighthouse” tab within the DevTools panel will not only audit your web pages speed but will also give you useful information on performance, best practices, accessibility and SEO. You could say that this is just a more advanced version than the tool listed above but is more suited to web developers. The downside here is that it also only provides audit results for ONE page - so not ideal if you want to check across multiple pages quickly.
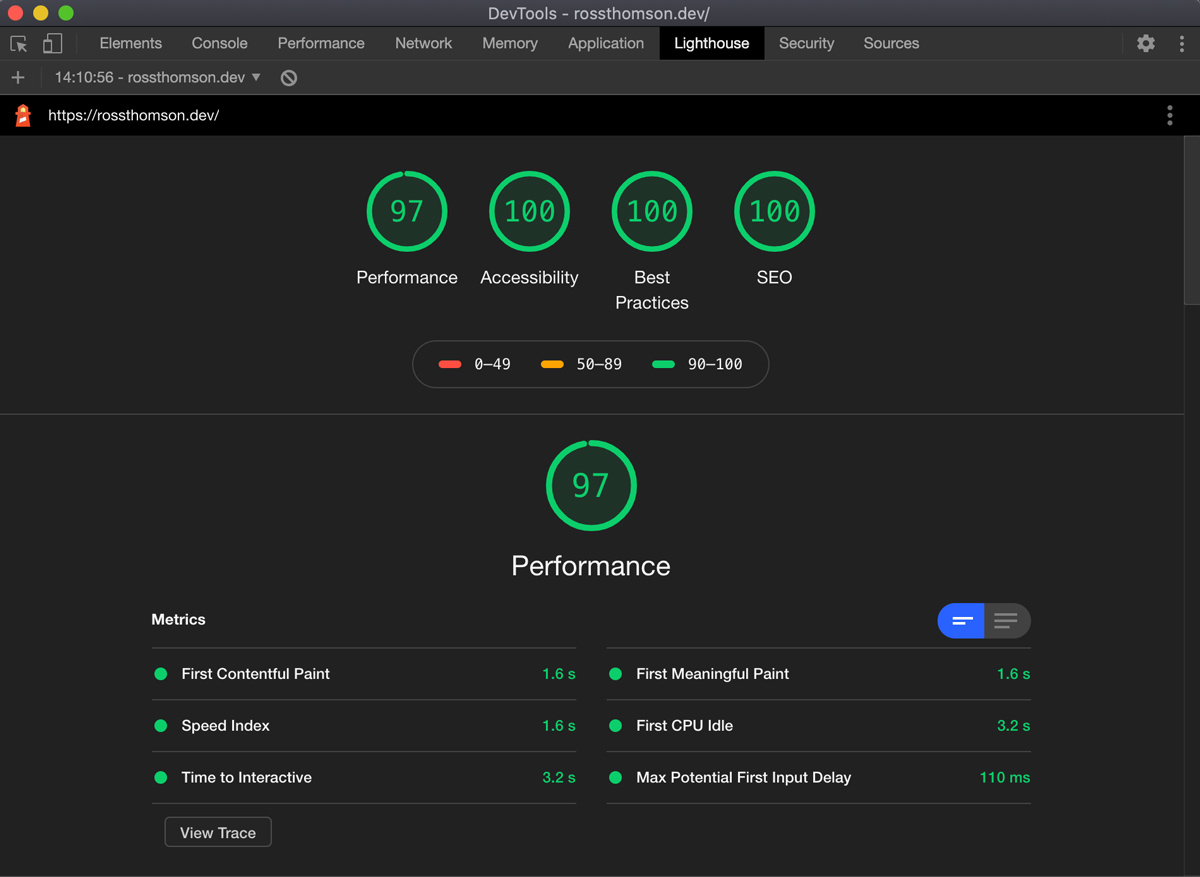
Top Tip: Use an incognito browser window when using Lighthouse as Chrome extensions can inadvertently affect your audit score!
Checkbot (Chrome Extension)
For site wide checks I like to use the free version of checkbot.io’s Chrome Extension called “Checkbot”. This browser extension is also really great for SEO checks across an entire site and will also notify you of any potential security risks. The paid version provides a more in-depth and detailed audit.
The tools discussed above barely scratch the surface when it comes to testing page speeds but those are some I find useful for auditing my web projects. Now that we’ve discussed how to check your websites page speeds we’ll now go onto what you can do at the beginning of your web projects to get speedy page loading times straight off the bat!
Minify your files & “web ready” your assets
Most of the time poor web page speeds are most effected by what files, scripts, and assets are being loaded on the web page. If you work with CMS’s like myself you’ll know that clients don’t always know how to reduce image file sizes and will upload huge high resolution images all over the place. Adding image transforms to your CMS can combat this but sometimes it can negative impact on poor quality images being uploaded. In this scenario it’s best to make sure that everything you load onto the page is up to standard by keeping the following points in mind during development:
- Minify your JS and CSS files
- For any third party stylesheets/scripts - use their minified versions!
- Optimise your images via your software of choice (mines is Adobe Photoshop)
- Use appropriate image sizes EVERYWHERE (Big image for small icon = bad)
- Use appropriate image file formats (.JPEG, .PNG, .WebP*, .SVG are usually best)
- Consider adding logic to your page to only load resources when they are needed
- Avoid excessive inline javascript
- Host any large videos externally on something like Youtube or Vimeo
- Use web appropriate web fonts (.woff .woff2)
*Be careful with .WebP images as browser support isn’t great for Apple/iOS/Safari: https://caniuse.com/#feat=webp
Caching
Another great way to improve web page loading times is to add some form of caching to your website. However it’s important to understand here what parts of your site are most suited to being cached, in that you should only really cache sections of a page which would benefit from it i.e something which doesn’t usually change that often and stays fairly static e.g a company logo or some never changing navigation.
The pitfall here is that you end up caching something which isn’t reflected on the front end upon a refresh/returning visit. This is most likely to happen if you cache something like a constantly updated blog feed driven by some kind of client CMS and the website visitor is served up some stale content. Therefore make sure to only cache page sections which aren’t super dynamic (in one way or another).
There are two ways in which you can cache your website:
Browser Caching
In browser caching your browser will store files like javascript, stylesheets, images and fonts for a specified period of time. This speeds up your loading times as the browser doesn’t need to retrieve those every time a user visits the site.
Server Caching
In server caching - instead of processing every request, the server takes the results of these requests and stores them. It then serves these “saved” results which makes everything load much faster! Server caching can be broken down into two methods “Object Cache” and “Full Page Cache”. Full page cache servers up an entire HTML page whilst object caching will just server up a section of a page (such as the footer).
Implementing caching onto your website completely depends on what type of server (Apache, Nginx, etc) it’s running on using and what technology stack your using. For example Craft CMS has a great range of plugins available for their developers to install on their website which can do some great and reliable caching. However most of these plugins require some kind of installation on the server (such as a PHP extension) so you need to make sure any that type of caching you implement is compatible with your server.